

BGA repair processViews:310Time:2021-04-22
AbstractBGA repair is usually to remove the components with function, damaged lead or wrong arrangement and replace them with new components. In other words, it is to restore the unqualified circuit components to the qualified components consistent with the specific requirements. When repairing by hand, care must be taken.
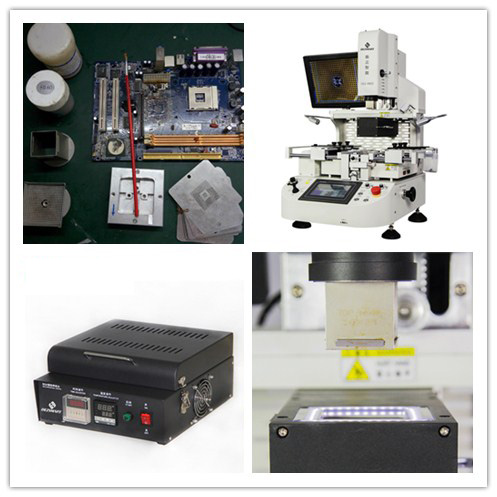
BGA repair is usually to remove the components with function, damaged lead or wrong arrangement and replace them with new components. In other words, it is to restore the unqualified circuit components to the qualified components consistent with the specific requirements. When repairing by hand, care must be taken. The basic principle is not to overheat the circuit board and components, otherwise it is easy to cause damage to the plating through holes, components and pads of the circuit board. (I don't recommend using hot air gun to repair) the BGA repair table is used to introduce the BGA repair process.
1、 Disassembly and welding
1. First of all, we need to preheat the PCB and BGA to remove the moisture inside the PCB and BGA. Constant temperature oven can be used for baking.
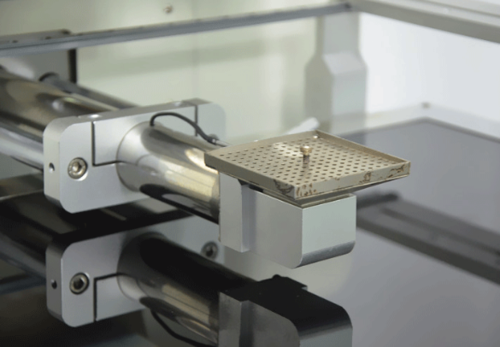
2. Select a suitable nozzle for BGA chip size and install it on the machine. The upper nozzle should completely cover the BGA chip or be slightly larger than 1-2mm. The upper nozzle can be larger than BGA, but it must not be smaller than BGA, otherwise it may cause uneven heating of BGA. The lower nozzle should be larger than BGA.
3. Fix the PCB to be repaired on the BGA repair bench. Adjust the position, clamp the PCB with clamp and make the lower air nozzle of BGA (irregular PCB board can use special clamp).
4. Setting the corresponding temperature curve, the melting point of lead is 183 ℃, and the melting point of lead-free is 217 ℃. It can be used and adjusted according to the lead-free standard temperature curve inside the rework table. It is also recommended to use BGA rework table which can set the temperature curve directly through the program, so that the operation is relatively simple, and the temperature can be monitored in real time to facilitate adjustment.
2、 Repair BGA
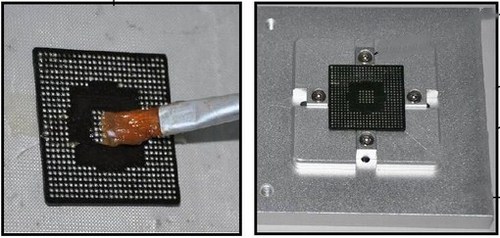
1. Cleaning pad: if BGA is just removed, it is better to clean the solder pad of PCB and BGA in the shortest time, because the PCB board and BGA are not completely cooled at this time, and the temperature difference will cause less damage to the pad.
2. BGA planting ball (German positive intelligent ball planting table, corresponding size tin ball, and steel mesh matching BGA are required here)
3. BGA Solder ball welding: set the welding temperature of the heating table (about 230 ℃ lead, about 250 ℃ lead free), place BGA after planting beads on the high temperature cloth in the welding area of the heating table, and use the hot air tube to heat it. When the solder ball of BGA is in the melting state, and the surface is bright and has obvious liquid sense, the solder balls are arranged in order. At this time, BGA is moved to the cooling table to cool and the welding is completed.
3、 Rewelding
1. Apply solder paste: to ensure the welding quality, check whether there is dust on the PCB pad before applying solder paste. It is better to wipe the pad before applying solder paste every time. Place the PCB on the workbench and apply a proper amount of solder paste on the pad position with a brush (too much will cause short circuit, otherwise, it is easy to solder empty, so the solder paste coating must be uniform and appropriate to remove the dust and impurities on the BGA Solder ball and enhance the welding effect).
2. Mounting: the BGA is aligned and mounted on the PCB; the BGA pad is basically overlapped with the PCB pad with the silk screen frame line as the auxiliary alignment, and the direction mark on the BGA surface should correspond to the direction mark of the PCB silk screen frame line to prevent the BGA from being put in the opposite direction. When the solder ball is melted and welded, the tension between solder joints will produce a certain self centering effect.
3. Welding: this procedure is the same as the disassembly procedure. Place the PCB board on the BGA repair bench to ensure that there is no deviation between BGA and PCB. Apply the temperature curve of desoldering and click welding. After heating and automatic cooling, it can be removed and repaired.
 Scan and focus on us